sitemap: false
The manual design grind was killing me
I spend way too much time staring at blank canvases in Canva or Photoshop. It starts with one post, then ten, then twenty, and suddenly I have spent four hours moving text layers three pixels to the left. It is a massive waste of time for someone who actually knows how to code. I wanted a way to just dump a list of titles and images into a folder and have a script spit out professional-looking social media graphics without me touching a mouse.
That is where autofacebookpost started. I did not want to deal with complex image processing libraries in Python like PIL or OpenCV because styling text with code is a nightmare. I already know CSS. I can build a layout in HTML in ten minutes that looks better than anything I can make in a dedicated design tool. So the goal was simple: use HTML as my design engine and use a headless browser to take screenshots of it.
I am 21, I do not have a budget for expensive API credits or high-end servers. I needed something that could run in a container, handle bulk uploads, and eventually push those images straight to a Facebook page because logging into Meta’s Business Suite is its own circle of hell. This project was about reclaiming my time and proving that I could automate the boring parts of being online.
How the engine actually works
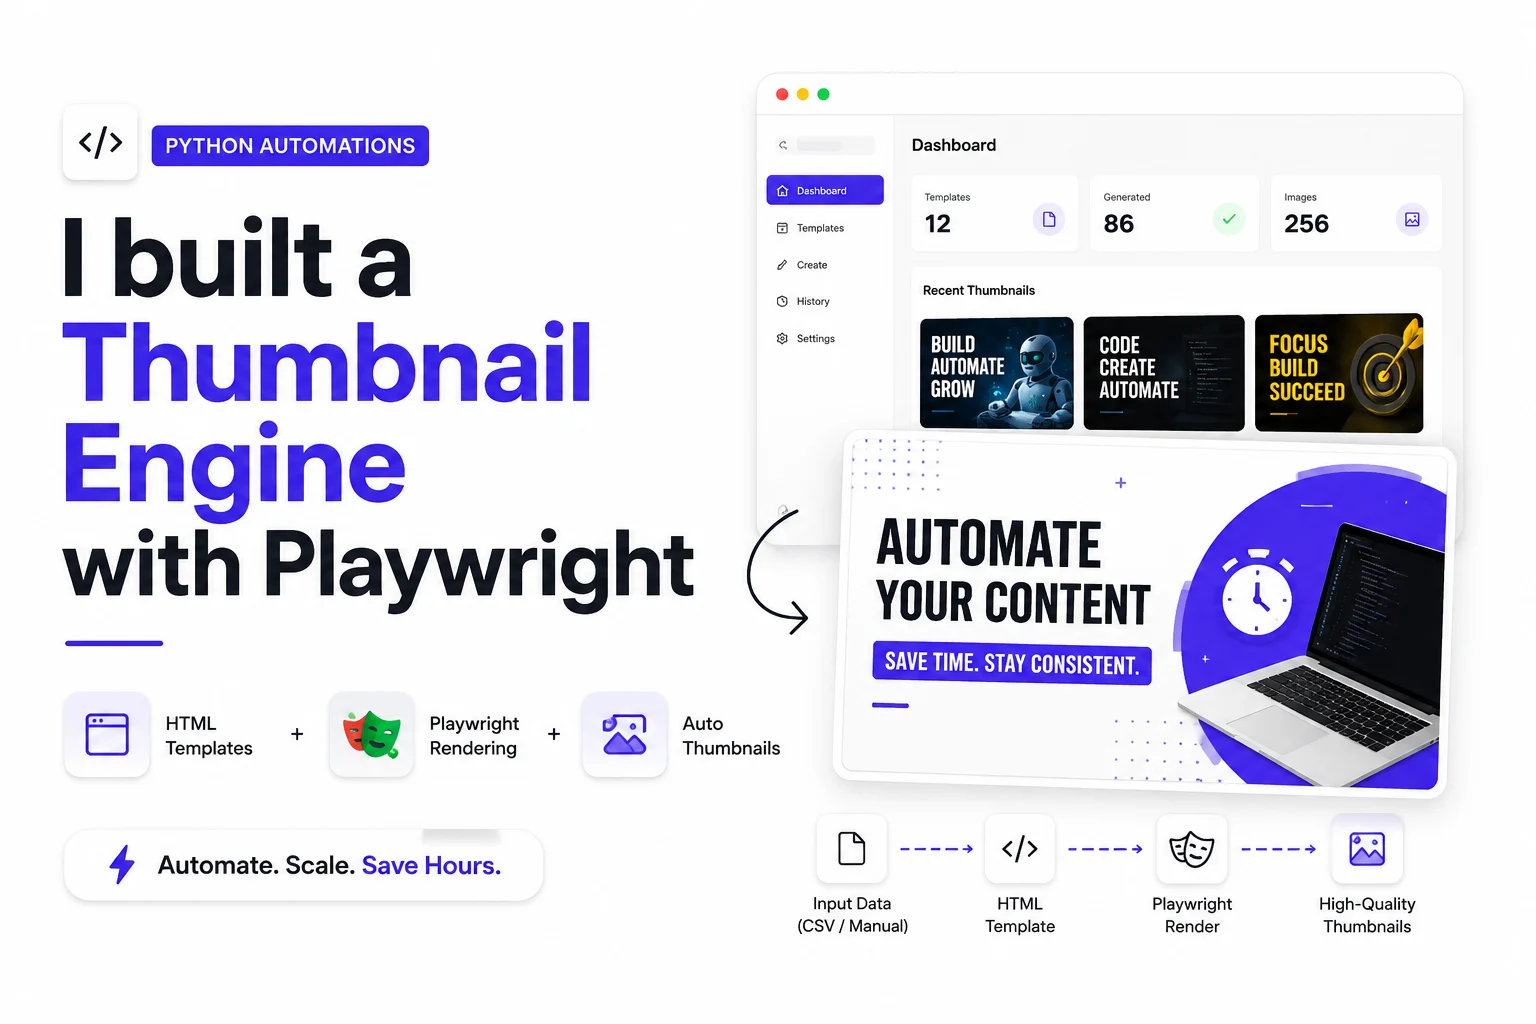
The stack is pretty straightforward but effective. I am using Flask for the web interface and Playwright to handle the heavy lifting of rendering. The core idea is that every thumbnail is just an HTML template. When I upload a CSV or enter data manually, the app injects those strings into the template, spins up a headless Chromium instance, and snaps a high-resolution screenshot.
In app.py, I set up the basic routes to handle the dashboard and the file management. I decided to use a local db.json file instead of a full SQL database. Is it scalable for a million users? No. Does it work perfectly for a single developer running it on a VPS? Absolutely. It keeps the project lightweight and portable.
The logic for actually generating the image is tucked away in makethumb.py. It uses Playwright’s async API to launch the browser. Here is a simplified look at how I handle that rendering process:
import asyncio
from playwright.async_api import async_playwright

async def generate_screenshot(html_content, output_path):
    async with async_playwright() as p:
        browser = await p.chromium.launch()
        page = await browser.new_page(viewport={'width': 1280, 'height': 720})
        await page.set_content(html_content)
        await page.screenshot(path=output_path)
        await browser.close()
By using page.set_content(), I can pass the fully rendered HTML string directly to the browser. I do not have to host the template on a public URL or deal with local file path permissions inside the browser context. It is fast, and because it is Chromium, I can use modern CSS features like Flexbox, Grid, and even complex text shadows or filters that would be impossible in a standard image library.
The Docker nightmare
I thought containerizing this would be easy. I was wrong. Playwright requires a massive list of system dependencies to run Chromium inside a Linux environment. My first Dockerfile was failing constantly because of missing shared libraries like libnss3 and libgbm1. I spent an entire afternoon just trial-and-erroring the apt-get install list.
I eventually settled on using python:3.11-slim-bullseye as the base image to keep the size down, but even then, the final image is nearly 1GB because of the browser binaries. I had to be very specific in the Dockerfile to only install Chromium and not the entire Playwright suite of Firefox and Webkit, which saved me a few hundred megabytes of disk space on my cheap VPS.
# Install system dependencies required for Playwright
RUN apt-get update && apt-get install -y --no-install-recommends \
    libnss3 libnspr4 libdbus-1-3 libatk1.0-0 \
    libatk-bridge2.0-0 libcups2 libdrm2 libxkbcommon0 \
    libxcomposite1 libxdamage1 libxfixes3 libxrandr2 \
    libgbm1 libasound2 && rm -rf /var/lib/apt/lists/*

# Install only the necessary browser
RUN playwright install chromium
Even after getting the dependencies right, I ran into memory limits. Chromium is a resource hog. Running multiple concurrent screenshot requests would occasionally crash the container. I had to implement some basic queueing logic in the Flask app to ensure I was not trying to open twenty browser tabs at once on a machine with only 2GB of RAM.
Templates and design decisions
I did not just want one look. I wanted variety. The thumbnail_templates/ folder is filled with different HTML files like template_gaming.html, template_corporate.html, and template_minimalist.html. Each of these uses specific Google Fonts and CSS variables for quick color swaps.
One of the tougher decisions was how to handle images within the thumbnails. Initially, I tried to upload them directly, but managing paths inside the templates was messy. I shifted to using external URLs or a dedicated image_uploads folder that the Flask app serves. This allows me to use a standard <img src="..."> tag in the HTML and let the browser handle the scaling and cropping via object-fit: cover.
I also built a “Manual Entry” mode. Sometimes I don’t have a CSV; I just have three ideas in my head. I created a UI where I can paste a list of titles and badges into separate textareas. The app splits these by newlines and matches them up. If I provide 5 titles and 5 images, it generates 5 thumbnails in a single click. It is a small feature, but it is the one I use the most.
The Facebook Graph API struggle
Getting the images generated was only half the battle. I wanted to post them. The Facebook Graph API is notoriously annoying to work with. You need a User Token, which you then have to exchange for a Long-Lived Page Access Token. If you get the scopes wrong, the API just returns a cryptic error message.
I wrote a helper function in app.py called get_page_access_token to handle this exchange. It was a headache to debug because Meta’s documentation doesn’t always match the actual behavior of their v19.0 endpoints. I had to deal with permissions like pages_manage_posts and pages_read_engagement just to get a simple photo upload working.
def get_page_access_token(user_token, page_id):
    url = f"https://graph.facebook.com/v19.0/{page_id}"
    params = {"fields": "access_token", "access_token": user_token}
    try:
        r = requests.get(url, params=params)
        r.raise_for_status()
        data = r.json()
        return data.get("access_token"), None
    except Exception as e:
        return None, str(e)
The app now saves these credentials in the db.json file. Once set up, I can pick any generated thumbnail from my library, write a caption, and hit “Post”. It even supports a “First Comment” feature, which is great for putting hashtags or links without cluttering the main post caption.
How to run this yourself
If you want to use this, you need Docker. I wouldn’t recommend trying to install the Playwright dependencies on your local machine unless you’re on a clean Linux distro, otherwise you will mess up your system libraries.
- Clone the repo to your server or local machine.
- Create a
db.jsonfile if it is not already there with the basic structure{"thumbnails": [], "social_media_credentials": {}}. - Build the image:
docker build -t autofacebookpost . - Run the container:
docker run -p 5002:5002 autofacebookpost - Access the dashboard at
http://localhost:5002.
You will need to go to the Settings page to add your Facebook Access Token and Page ID if you want to use the posting features. For the templates, you can either use the ones I built or upload your own HTML files to the thumbnail_templates directory. Just make sure your HTML uses the variables the app expects, like {{ main_title }} and {{ image_url }}.
Who this is for
This is for the developer who is running a side project or a niche news site and cannot justify hiring a designer. It is for people who believe that if you have to do something more than twice, you should probably write a script for it. It is not a replacement for a real creative director, but it is a massive upgrade over default, boring social media posts.
I built this for me. I needed a way to maintain a social presence for my projects without it becoming a second full-time job. It is grounded, it is a bit rough around the edges, and it solves exactly one problem: making and sharing graphics fast.
What I would change next
The biggest thing missing is a proper scheduling system. Right now, it posts immediately. I have some UI code in facebook_post.html for a scheduler, but the backend logic for a task runner like Celery or Redis isn’t there yet. I did not want to add that complexity in version one, but as I use it more, I realize that being able to batch-create and schedule a week’s worth of posts on Sunday night is the ultimate goal.
I also want to add support for more platforms. Instagram is the obvious next step, but their API is even more restrictive about third-party uploads. I might have to look into using Playwright to actually automate the web-based upload flow if the API continues to be a bottleneck. Finally, I’d like to integrate a basic AI prompt that can generate the titles based on a URL, so I don’t even have to think of the headlines myself.